Showing posts with label split stitch. Show all posts

Friday, December 11, 2020

~ Angel Embroidery Tutorial/Pictorial PART 2 ~

 
Hello Friends & Folk!
 
I hope you are enjoying following along on this tutorial/pictorial for my little Angel ~
today we are going to work on her ribbon and her dress...

grab your needle and lets go!
 
this is where we left off last time...
her face, hand and hair were done and I showed you how to add detail with your pencil: 


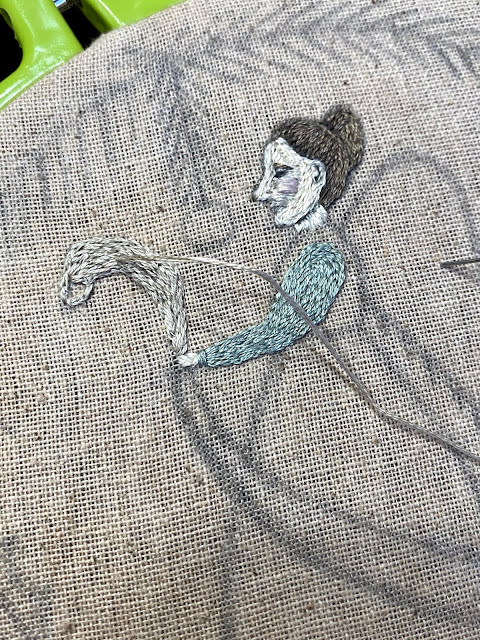
now we will work her sleeve...
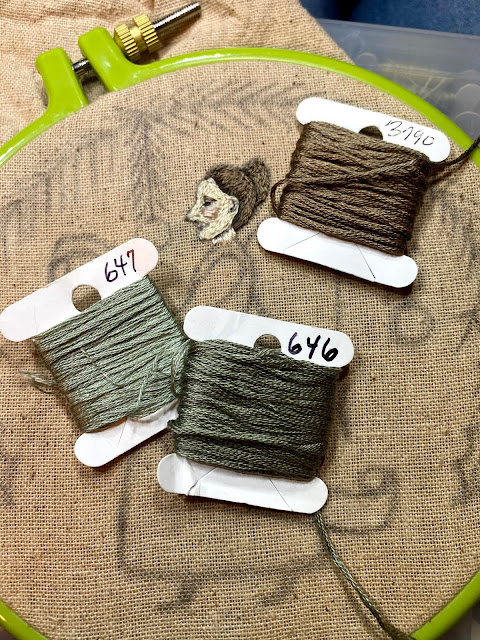
DMC 647 {3 strands} will be used for her sleeve, 
and 646 {3 strands} will be used for her skirt ~


again, using tiny split stitches, outline the sleeve...


once you have outlined the sleeve, 
continue to fill in the area in the direction of the motif ~


now we'll work on her ribbon, using DMC 3782 {3 strands}
and outline and fill the same way...small little split stitches, outline and fill in the direction of the motif.


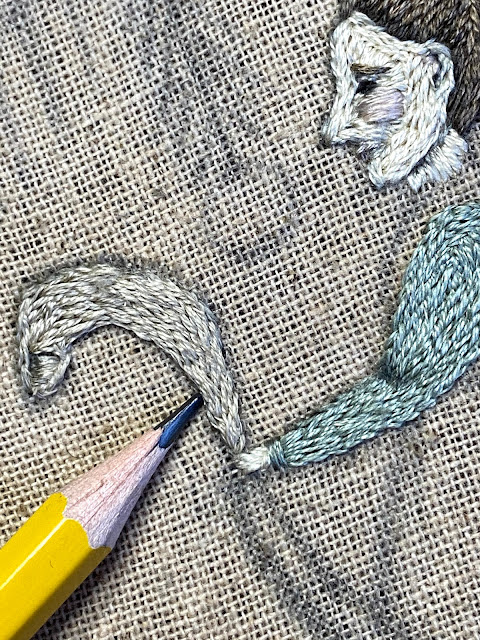
you can see in the photo below, 
how I use my stitches to create movement, for example the curl of the ribbon under itself:


and then I use my pencil to shade and define...


once the top portion of the ribbon is finished,
begin to stitch the lower portion the same way...


I love seeing my little stitches come to life when they're filling in a motif!
 
 
use your pencil once again to shade and outline...


Once the ribbon is finished, let's work on her shirt...
DMC 646 {3 strands} and again, the simple split stitch...
 
 
outline, fill in the direction of the motif,
then shade...


and now the skirt ~ 
you can see in the photo below that I have used my pencil to divide the skirt into portions, 
this helps me keep my stitches moving in the direction of the motif {in this case the skirt}
I'm working on the portion of her skirt that is 'above' the ribbon...
 
{and you can also see how I have once again used my pencil 
to shade the ribbon in places to look like folds or shadows}
 

filling in the skirt, up & down...
in the drawn/divided sections ~


 And here is where we will end for today!
 
I will finish the skirt, then our next 'lesson' will be her shoes and remaining
holly leaves, bough and ornaments ...

I'll post on Facebook and Instagram when to look for Part 3 ~

Blessings from the Farm 
~ Lori

Tuesday, April 14, 2020

~ Old Things, New Things... ~


 Good Morning Friends & Folk ~
and a happy Tuesday Morning in April to you all....

I've been thinking about something,
{well, a few things to be exact}
but one thing in particular;

I want to publish another book.
there ~ i said it.

A self-published book...
that I will author, illustrate and photograph.
AND it will be a book about Embroidery!

{OH, I can hear the cross stitchers, rug hookers and punch-needlers out there saying "boo!"}
but, this is a way for me to share my love of embroidery with you.

There will be projects with step by step photos, 
and tips on my techniques to achieve the look I get with those tiny little split stitches.
 featuring my "Primsical" characters and little folk like my Farm Witches and Rabbit Ladies
with a few new 'folk' included that I'm working on now.

{btw, 'primsical' is how i describe my work and style: Primitive + Whimsical = Primsical!

a coffee-table styled book that will be pretty to look at and informative as well...


I have a ton of work to do for this endeavor ~
but there is no time like the present to begin work on something that I have been longing to do.
~ my creative juices are flowing and my cup runneth over with ideas!


 I am hoping that my excitement about this gets you, 
my needlework-loving friends excited too ~


Blessings from the Farm
 ~ Lori

Saturday, March 28, 2020

~ Rabbit Season ~


Good Afternoon ~ Friends & Folk ~
...happy Saturday to us all...

warm temps and some sunshine has found me outdoors,
working in the kitchen garden and stitching on the patio!

I have been creating little rabbits ~
in thread and wool:

here is a little gardening lady in my hoop...


and a little needlefelted wool bunny in my garden of violas...


{and a cute little carrot too!}
 

I'm heading out to the garden & patio again today
 to stitch and felt a little bit more while the weather is good,
...they are predicting rain again in the forecast.


hoping your day is filled with sunshine & good health!
Blessings from the Farm
 ~ Lori

Monday, November 18, 2019

~ Monday Musings ~

Good Monday Morning 
~ Friends & Folk ~ 

a lovely November day is ahead for us here on the Farm...
overcast with a bit warmer temps,
still the crispy leaves & slight snappy breeze reminds us what time of the year it is ~

Don't you just love magazines and books?
{well I do!}
I pulled out a few older issues of 
Inspirations Magazine last evening...just to revisit the beautiful photos and wording.
It truly lives up to it's reputation of being the 'World's most beautiful magazine'
here is the link if you choose to subscribe to the magazine 
and/or their most-fabulous newsletter via email:

and I just received this book:
Stitch Craft by the very talented Gayla Partridge {shown below}
it contains a beautiful array of her fabulously embroidered works with such detailed photos! 
I purchased my copy from Amazon Prime.


Speaking of embroidery...
I know you have seen this one previously ~ 
but I wanted to see how it looks in this little frame...
what do you think? frame it? or make another pillow?
I'm leaning towards to frame {hint hint} lol

the title of this work by me is
"Christmas Goose"


and yes, I am planning on releasing this as a pattern for those who have asked.
although this is a bit more detailed 
than my other split stitch embroidery patterns/designs,
~ it is very easy to do still! don't be intimidated Friends!!

I will be posting pictorials here on this blog of my step-by-step directions
 on how I stitch these kinds of works...
 

simple split stitch combined with DMC floss...
details like the face are 2 strands, and the rest is stitched with 3 strands ~


here is the other project 
that I will release a pattern for along with the aforementioned:
...remember him?
this is "Hello Holly Santa"


Adding beading to these tiny works is a fun thing to do as well...
just a sprinkling here & there really makes the finish pop!

OH! and I have a trick that I will share with you 
on how I achieve the shading in these small embroideries ~
{some of you might know, as I have shared that technique with a chosen few}
but I think those who don't know will be amazed!


Look for the patterns for these to be released sometime next week in my Etsy Shop...
I will post about that on FB & IG too :)

The other day, a friend came into the Studio wanting to learn needlepoint ~
she asked if I could show her the bare-bones basic, so I did.
I grabbed some old canvas {think it is either 7 or 10}, a black sharpie, a tapestry {blunt} needle
and for the fibers I used size #3 DMC Pearl Cotton, which I doubled...
and voila! this is what came of that:
 

now I know that my colors seem to fade and blend into one another,
and by looking at a black & white photo of this project you can clearly see there is no definition 
between my stitched motifs and the background itself....

~ it's a common technique for rug hookers to do this, 
to check the values on their rugs as we hook them.
 

but since this is the first project that I have needlepointed in forever,
and since it was just for fun, and also since I will be keeping this and making it into a cuff bracelet ~
I will ALSO add beading to it's surface...another sprinkling of beads if you will.

a little beady-bling!

can you see how shiny the threads are since I didn't use wool? 
and they got even shinier when I ironed this to block it...
a happy accident by using pearl cotton to do needlepoint with!

love when things like this happen....
 

Well Friends,
I am off to process orders, paint wooden products, 
~ and work on finished goods for our Christmas Open House which will be here before we know it!

wishing you all a beautiful day filled with Inspiration and Creativity!

Blessings from the Farm 
~ Lori