
Hello Friends & Folk!
I hope you are enjoying following along on this tutorial/pictorial for my little Angel ~
today we are going to work on her ribbon and her dress...
grab your needle and lets go!
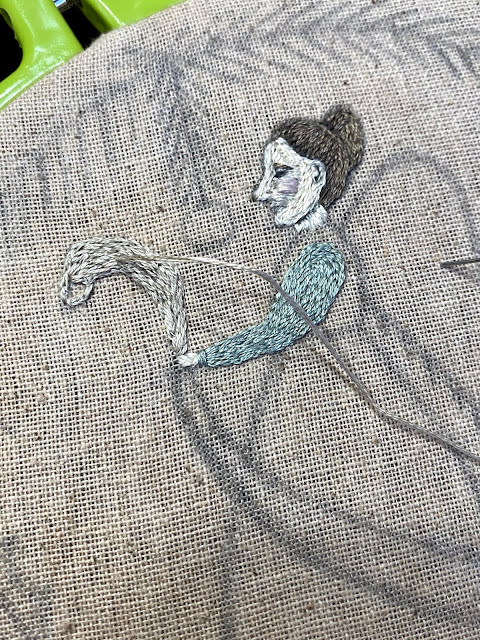
this is where we left off last time...
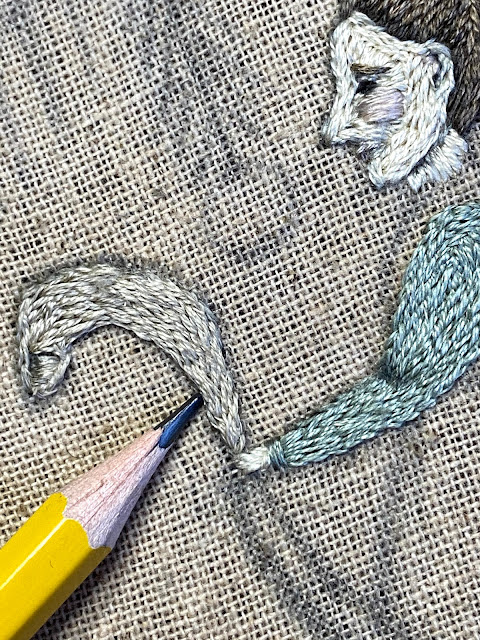
her face, hand and hair were done and I showed you how to add detail with your pencil:

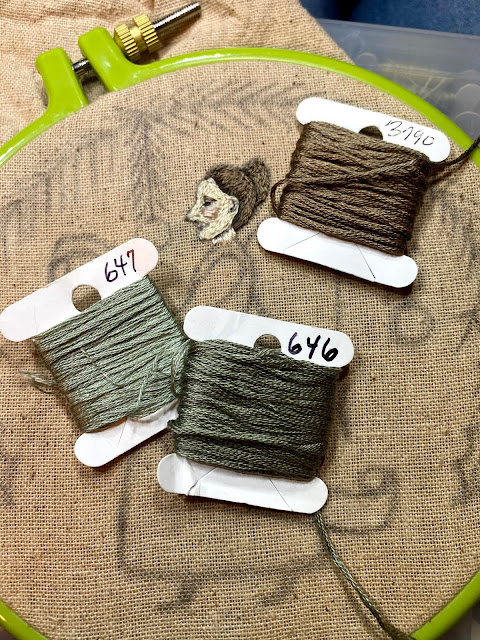
now we will work her sleeve...
DMC 647 {3 strands} will be used for her sleeve,
and 646 {3 strands} will be used for her skirt ~
again, using tiny split stitches, outline the sleeve...


once you have outlined the sleeve,
continue to fill in the area in the direction of the motif ~


now we'll work on her ribbon, using DMC 3782 {3 strands}
and outline and fill the same way...small little split stitches, outline and fill in the direction of the motif.

you can see in the photo below,
how I use my stitches to create movement, for example the curl of the ribbon under itself:

and then I use my pencil to shade and define...

once the top portion of the ribbon is finished,
begin to stitch the lower portion the same way...

I love seeing my little stitches come to life when they're filling in a motif!
I love seeing my little stitches come to life when they're filling in a motif!

use your pencil once again to shade and outline...


Once the ribbon is finished, let's work on her shirt...
DMC 646 {3 strands} and again, the simple split stitch...

outline, fill in the direction of the motif,
then shade...


and now the skirt ~
you can see in the photo below that I have used my pencil to divide the skirt into portions,
this helps me keep my stitches moving in the direction of the motif {in this case the skirt}
I'm working on the portion of her skirt that is 'above' the ribbon...
{and you can also see how I have once again used my pencil
to shade the ribbon in places to look like folds or shadows}

filling in the skirt, up & down...
in the drawn/divided sections ~


And here is where we will end for today!
I will finish the skirt, then our next 'lesson' will be her shoes and remaining
holly leaves, bough and ornaments ...
I'll post on Facebook and Instagram when to look for Part 3 ~
Blessings from the Farm
~
Lori
Wow , you make it look so easy and pretty Lori !!! Just Love this Angel !!! I am going to have to try this !!! But I need a few more hours in the day or less time spent babysitting ...it's a toss up !! Thank you for teaching us !!!!
ReplyDeleteBeautiful stitching
ReplyDeleteI haven't done this stitch for years, but now I have confidence again that I can do this! Thank you so much!
ReplyDeleteEEEEH!!! I so want to do this!!!! Just have to get my act together!! She is gorgeous! ~Robin~
ReplyDelete