No, Iggy…
you don't need to hide your tail ~
I'm talking to our readers here…
:)
Howdy Folks!
as promised,
here's the part where I share with you
how to hide the ends of a braided edge on your hooked projects ~
once you have hand stitched your braided edging to the edge of your linen
{or rug foundation of your choice} almost all the way around, you will need to pull the initial end that you began with to the backside of your project…as shown below:
 |
continue to stitch the braid to the edge of the linen coming close to but not all the way to the initial stitched down {beginning} end.
see below:
when you get to within 1/4 in away from the beginning end,
overlap the braid & the beginning end and stitch together as shown below:
Now
working from the front-side of your project,
bring the braid OVER the initial stitched {beginning} end:
continue to sew the braid down to the initial {beginning} end,
by pushing your needle & thread through both braids ~
… as shown below:
once you feel comfortable that you have stitched the long end of the braid down
over the initial {beginning} end of your braid,
{making sure to stitch all three strips of your braid together so it does not unravel}
you can cut your ending braid with sharp scissors.
BE CAREFUL not to cut any of your stitches!
I use a safety pin to hold together the strips of any remaining braid left
for any future project ;)
Now that you've stitched and cut the long end of your braided edge off,
you will need to complete the stitching by bringing your needle & thread through both braid ends
and stitching them together neatly tucking in the braid ends.
see below:
keep needle-tucking in and stitching the ends like I'm doing below
until you're finished…
...you can now see that by taking your time,
tucking in any loose edges and making tiny stitches
~ you can almost make that end disappear!
this is the back of the project showing the bottom edge
and the two ends of the braid stitched together at center/bottom
below:
here is another view of the back of my project, but the upper corner…{below}
see how by tearing the homespun into strips before braiding, I can create a very primitive yet neat finished edge that helps to 'hide' those ends too?
tricky huh… :)
and here is the front of my project {below}
showing the bottom/center where I've stitched the ends together:
and again the upper corner {below}
where you can see the frayed/ripped edge of the braided homespun strips I used…
simple. primitive. perfect!
now I'll add my label ~
using muslin, Prismacolor pen in a sepia-tone & needle and thread
{{ the safety pin will be used as a hanger on the top/back! }}
running stitch…..
label is stitched on {need to press it still}…
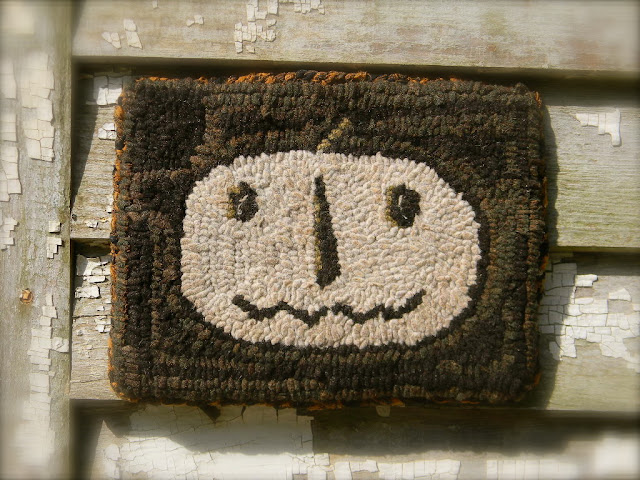
and here he is all finished!
just a glimpse of the braided edge shows…I like it this way me thinks.
the edge doesn't overpower the hooking, but accents it.
…just enough.
hope I didn't confuse anyone,
... if I did email me!
now onto the next!!!
have a beautiful & creative day my Friends!!
~ Blessings from the Farm ~
Lori


11 comments:
Love this Lori- question about the strips- I assume you rip (tear) the homespun strips? Do you iron the raw edges together? What size strips did you use? I'm thinking I might braid it into a rug (I crocheted one with homespun-- one of most treasured possessions)
I just begun punch needling a few months ago and this is a good finish! Thanks for the info.! Also, Lori, thanks for showing a safety pin too! I have some things done in cross-stitch that I put together as mats and didn't really know what to do with them. I just lay them over a chair but the safety pin helps to keep things in place😉 love your design and maybe I will learn to rug hook too one day✂️
Thanks again!
Tammy
Great demonstration -- and your photos are always so beautiful!
Thanks Lori!
I used a braided edge last year on your pattern Ye Ladye Pumpkin. I had quite a difficult time meshing the two ends together...I have saved these instructions for next time. I absolutely love the way it finishes a punched or hooked piece! White Jack is beautiful...will he be a pattern?
Martha
Wonderful, Lori!! THank you so much! I really love the finish!
Brilliant finish to a charming jack!
Oh where were you when many many years ago my mom made a braided rug (I helped) and I had to stitch thee rows together....learning as I went. Your tutorial is excellent.
Love this White Jack. Beautiful finish Lori. Is he for sale? Janice
Love love your finished piece! The muted color palette will take this from hallowe'en all through autumn. Love the hint of the expected black and orange in the braided accent. Just brilliant and I feel inspired to rethink my own hallowe'en decorations!
Lori, Beautiful work & perfect finish. I actually even like the back side! I think the turned edge would look equally good on the front as a border along with the braid!
Luv that little Iggy face too. :-)
"Have a wonderful weekend!" Best wishes, ~C
Love how he turned out! Thank you for the tutorial....
Post a Comment