

Friday, December 25, 2020
Thursday, December 17, 2020
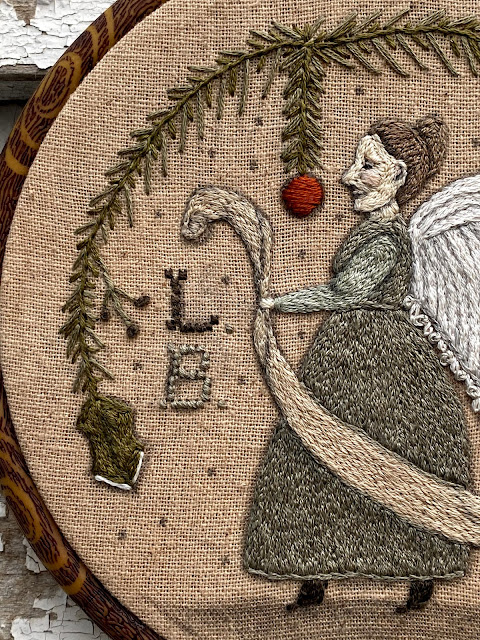
~ Angel Embroidery Tutorial/Pictorial ~ PART 3 ~
Hello Friends & Folk!
~ thank you for following along with me to this,
PART 3 and the final posting for my Angel Embroidery Tutorial/Pictorial!
here she is, all finished and displayed in a Nurge Hoop
{available from many sellers on Etsy, type in Nurge or faux wood embroidery hoop}

We left off at filling in her dress...
as seen in the photo below;
once again using the outline and fill technique,
...with the split stitch being the fill and outline stitch.
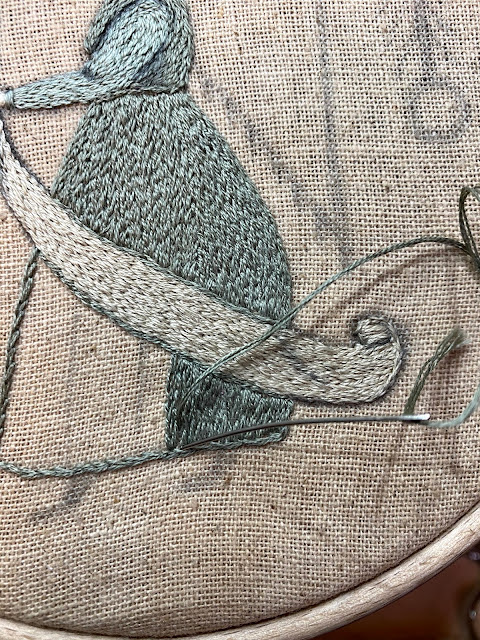
here the dress is entirely filled in...

now we'll embroider her boots
using 3 strands of DMC 3021 cotton floss:

short little straight stitches, then begin to fill with split stitch...

Once both boots are completed,
I go back in with my pencil to add shading to the dress,
~ around the ribbon she is holding and around the boots too...

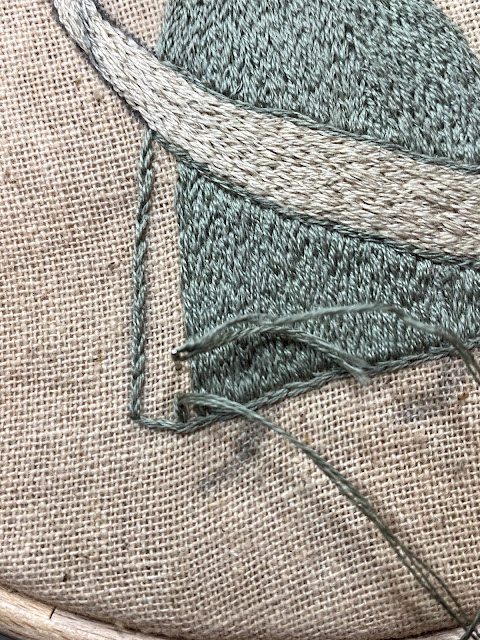
Now we'll stitch her wing...
DMC 3865 {again, 3 strands} will be the predominant color for the wing, but
~ around the ribbon she is holding and around the boots too...
Now we'll stitch her wing...
DMC 3865 {again, 3 strands} will be the predominant color for the wing, but
we will be using 648 too in a bit....

outline the entire wing, and then fill with split stitch...
and as you can see in the photo below
I have once again used my pencil to draw directional guidelines to follow for my stitches...

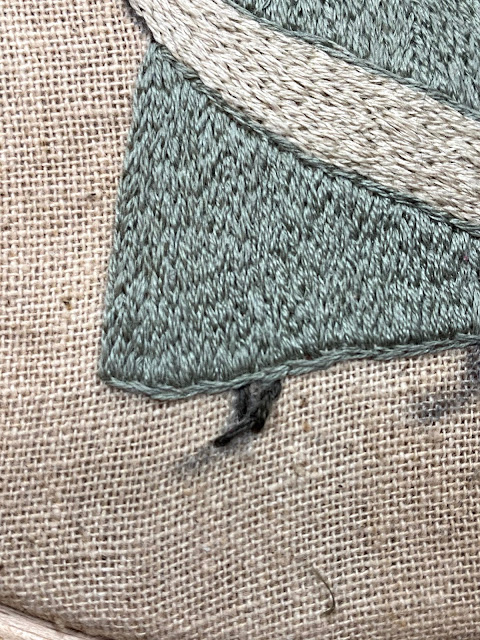
I didn't want to forget to add some additional detail to the bottom of the wing,
so I intermittently stitched a few lazy daisy stitches as seen below:

...finishing the top portion of the wing, working in the direction of my penciled guidelines;

now to use the 648, {3 strands again...}
this time make small french knots between the lazy daisy stitches as shown below ~

my french knots are wonky, just like me...

once you have finished your french knots and your wing is completely filled in,
take your pencil and shade the wing as shown below...
now you don't have to do this part, but I love the look and detail this gives, and my pencil lead color almost matches the DMC 648 thread!

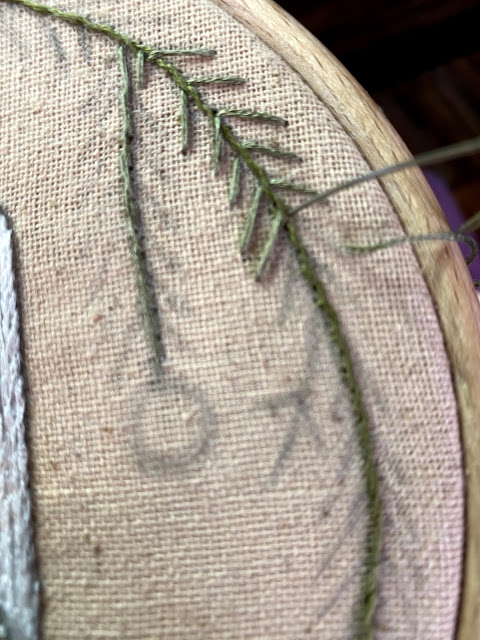
Now we will work on the pine bough, holly leaves and then the ornaments
using the colors below of DMC thread {3 strands}
3371, 3011 & 400 {a favorite red}

starting with the 3011, I am making stem stitches all along the center line of the bough, beginning from the tip of one holly leaf, up and over the angel, and down to the tip of the other holly leaf...

once I have stitched from leaf to leaf, I thread with 3371 {3 strands}
and make straight stitch pine needle as indicated on your drawn pattern...
once your pine needles are all stitched, take the 3865 thread and split stitch the very tips of the holly leaves as shown below:

then fill in the holly leaves with split stitch using 3011,
and use your pencil to once again add shading down the center of leaf and
outline...

we'll be using the 400 {3 strands} to embroider the ornaments with padded satin stitch next,
BUT before we do I wanted to show you that I added smaller straight stitch pine needles between the long ones that are shown on the pattern template...to me it makes them fuller, you can opt to do yours this way, or not ;)
~~~ So, to make the padded satin stitch ornaments,
begin by filling in with satin stitch going vertical


then doing satin stitch over that, going horizontal...

you will embroider both ornaments this same way.

I usually add a penciled 'ground' to my work,
and will look over my project to see where else my pencil may lend a bit of detail...

I never can leave enough alone,
so I used my pencil to draw my initials, which I crudely cross stitched {lol}
and poked a bunch of holes to look like snowflakes {lol again}
I also added french knot berries to the two twigs in the pine bough...
and went around the ornaments once more time with my pencil
{just for good measure}
lol once more...

I am so happy with my results and my finish!
I love finishing 'in the hoop' and prefer to use these flexible, faux wood-look hoops
from Nurge...again you can google the maker, and there are many sellers on Etsy & eBay.


the hoops come with a hanger,
but I love to tuck my hoops in different vignettes...
I hope you have enjoyed seeing how I came up with my
Shaded Embroidery™ Technique!!!
Kindly share your works with me on Instagram and Facebook by tagging me:
Blessings from the Farm
~
Lori
Friday, December 11, 2020
~ Angel Embroidery Tutorial/Pictorial PART 2 ~
Hello Friends & Folk!
I hope you are enjoying following along on this tutorial/pictorial for my little Angel ~
today we are going to work on her ribbon and her dress...
grab your needle and lets go!
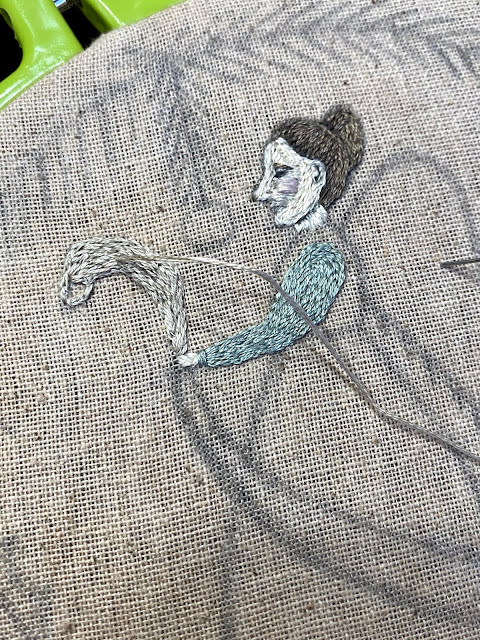
this is where we left off last time...
her face, hand and hair were done and I showed you how to add detail with your pencil:

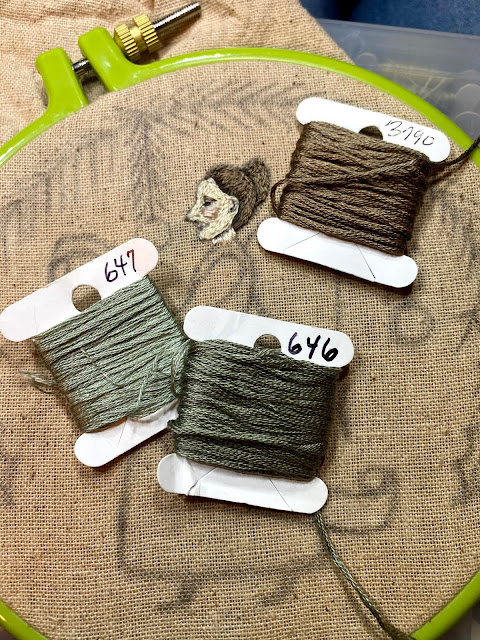
now we will work her sleeve...
DMC 647 {3 strands} will be used for her sleeve,
and 646 {3 strands} will be used for her skirt ~
again, using tiny split stitches, outline the sleeve...


once you have outlined the sleeve,
continue to fill in the area in the direction of the motif ~


now we'll work on her ribbon, using DMC 3782 {3 strands}
and outline and fill the same way...small little split stitches, outline and fill in the direction of the motif.

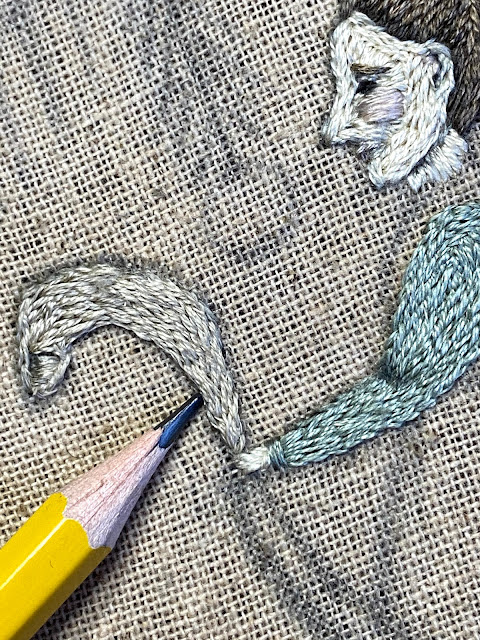
you can see in the photo below,
how I use my stitches to create movement, for example the curl of the ribbon under itself:

and then I use my pencil to shade and define...

once the top portion of the ribbon is finished,
begin to stitch the lower portion the same way...

I love seeing my little stitches come to life when they're filling in a motif!
I love seeing my little stitches come to life when they're filling in a motif!

use your pencil once again to shade and outline...


Once the ribbon is finished, let's work on her shirt...
DMC 646 {3 strands} and again, the simple split stitch...

outline, fill in the direction of the motif,
then shade...


and now the skirt ~
you can see in the photo below that I have used my pencil to divide the skirt into portions,
this helps me keep my stitches moving in the direction of the motif {in this case the skirt}
I'm working on the portion of her skirt that is 'above' the ribbon...
{and you can also see how I have once again used my pencil
to shade the ribbon in places to look like folds or shadows}

filling in the skirt, up & down...
in the drawn/divided sections ~


And here is where we will end for today!
I will finish the skirt, then our next 'lesson' will be her shoes and remaining
holly leaves, bough and ornaments ...
I'll post on Facebook and Instagram when to look for Part 3 ~
Blessings from the Farm
~
Lori
Subscribe to:
Posts (Atom)